
Step-by-step directions on how to make a DIY mini keg system for home brew.
This DIY mini keg system for homebrew has been a passion project for me and took months to create.
The biggest problem I faced was figuring out how to force carbonate the keg and get the beer out only using the hole at the top of the keg.
The solution to that problem was a compression adapter screwed to the top of a threaded tee and using a copper dip tube.
I could try and explain this step by step but it can get confusing. It would be easier to show you.
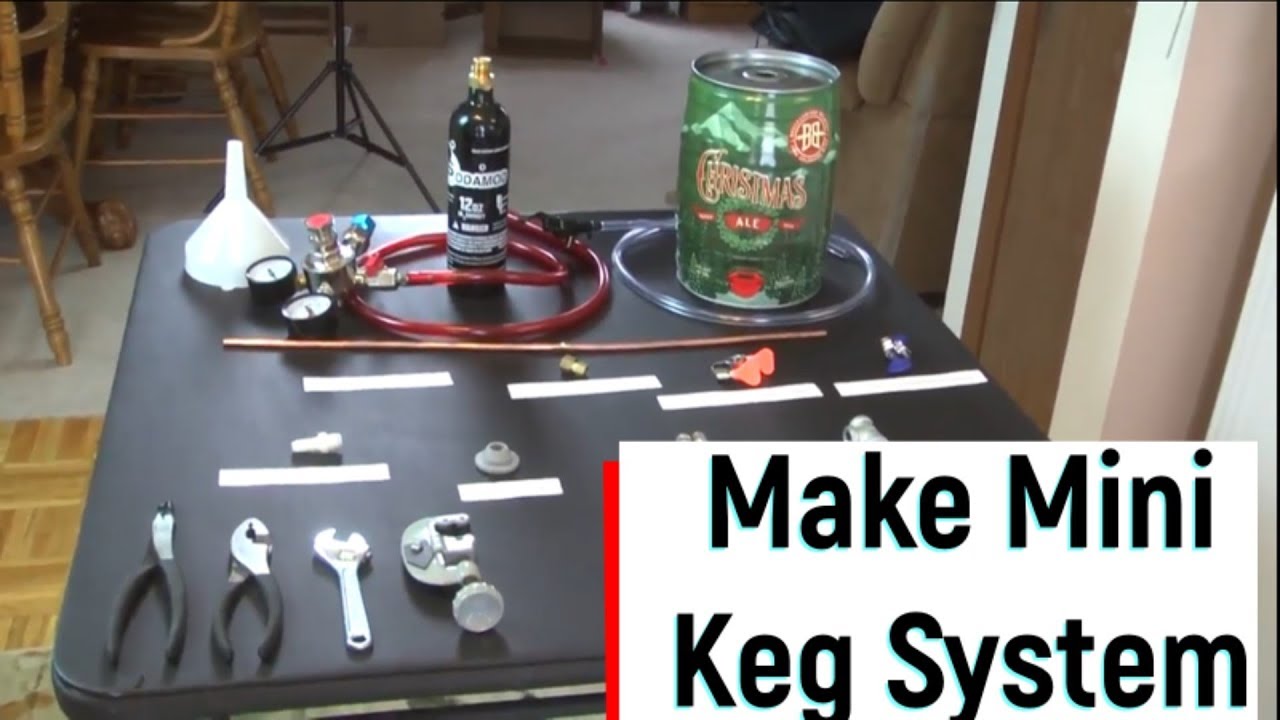
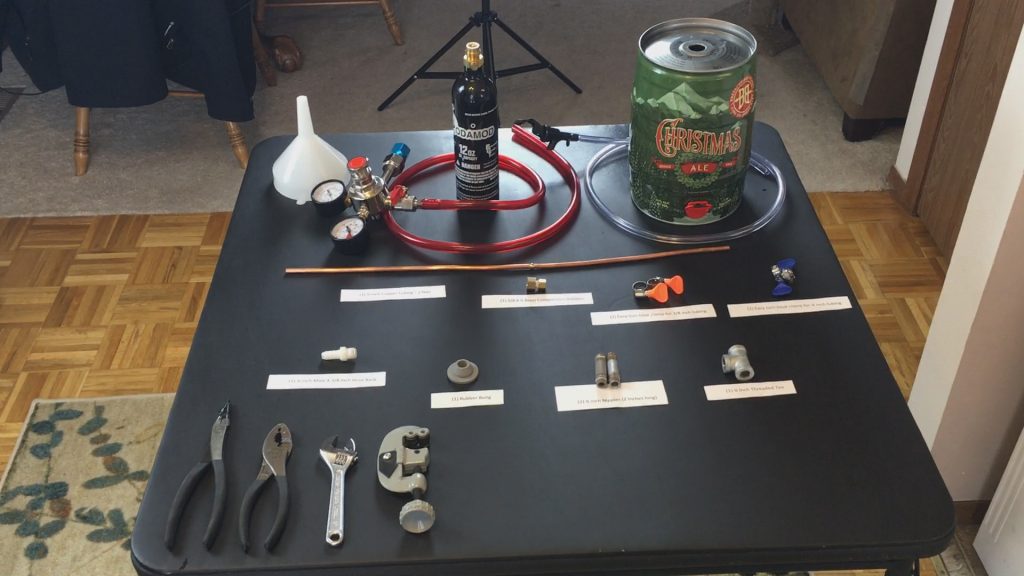
I put together a detailed video of myself building the mini keg system for homebrew and will list the items below with links.
Supplies
*As an Amazon Associate I earn from qualifying purchases. All links in this post are affiliate links meaning I get paid for qualified purchases.
Mini Keg (Paid Link)
Dual Gauge CO2 Draft Beer Regulator (Paid Link)
2 ft 1/4 inch copper tube (Paid Link)
(2) ¼ inch Nipples (Paid Link)
Rubber Bung (Paid Link)
3/8 X ¼ Brass Compression Adapter (Paid Link)
¼ inch Male X 3/8 inch Hose Barb (Paid Link)
How the mini keg system works
- Co2 goes through the regulator and into the Hose Barb.
- From the Hose Barb the co2 goes into the Threaded Tee.
- Co2 inside the threaded Tee will try to leave out both sides but the compression adapter will stop it from going up and force it down into the keg.
- With no where else to go the Co2 travels down the threaded Tee through the Nipple, around the copper tubing and into the keg.
- The Gray Rubber bung creates a seal at the top of the keg.
- Once the Co2 is inside the keg the air tight seal produced with the compression adapter will trap the Co2 inside the keg causing force carbonation.
- Inside the Compression adapter is a ¼ inch copper tube which runs down the nipple, through the threaded tee, through the other nipple and to the bottom of the keg.
- At the top of the system the end of the copper tube sticks out through the Compression Adapter where ¼ inch Keg Line tubing is connected. Using a Hose clamp that creates an air tight seal.
- On the other end of the ¼ inch keg line tubing is a Party Tap also with a hose clamp.
The whole system is air tight which causes pressure to build inside the keg. Once the pressure is released by opening the party tap the beer will flow freely.
Other Items:
- ¼ inch Male X 3/8 inch Hose Barb
- Easy turn hose clamp for 3/8 inch tubing
- Easy turn hose clamp for ¼ inch tubing
- ¼ inch Party Tap
- ¼ inch Keg line tubing – 4 feet
- 3/8 inch Keg line tubing – 4 feet
See my updated version where I use Ball Locks: https://homebrewtutorials.com/mini-keg-with-ball-lock-tap-system/

Above are links to items used in my mini keg system. As an Amazon Associate I earn from qualifying purchases.